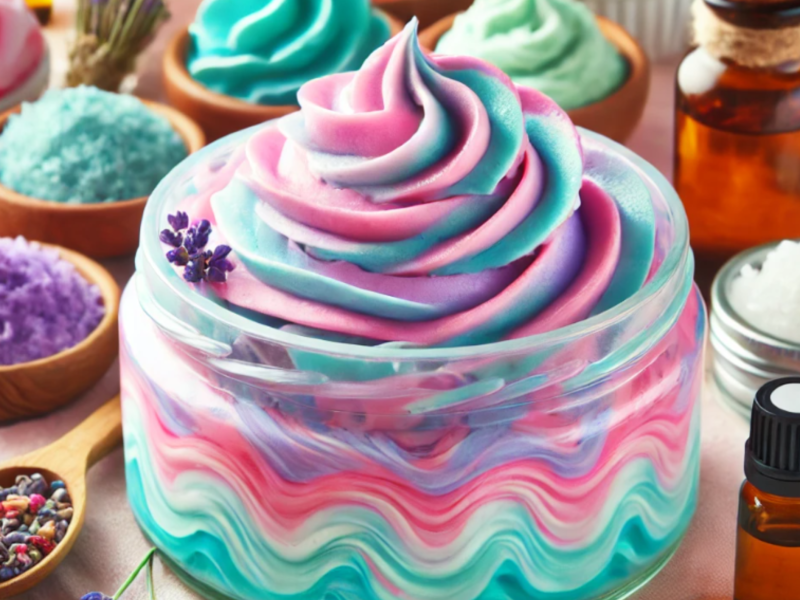
If you’re looking for a luxurious treat for your skin, look no further than this fun, colorful DIY whipped massage butter! It’s not only easy to make but also packed with nourishing ingredients that will leave your skin feeling smooth, hydrated, and pampered. Whether you’re giving yourself a relaxing massage or just want to add a pop of color and fragrance to your skincare routine, this whipped massage butter will do the trick.
Why Whipped Massage Butter?
Whipped massage butter is a delightful way to hydrate and nourish the skin while giving yourself a relaxing massage. The fluffy texture makes it easy to apply and absorb, while the combination of nourishing oils and butters deeply moisturizes, leaving your skin soft and glowing. Plus, it’s totally customizable with your favorite scents and colors, so you can make it as unique as you are.
Ingredients You’ll Need
For this colorful whipped massage butter, you’ll need the following ingredients:
- 1/2 cup Shea Butter: Known for its deeply moisturizing and healing properties, shea butter is great for nourishing dry skin.
- 1/4 cup Cocoa Butter: Cocoa butter helps to improve skin elasticity and is perfect for massaging.
- 1/4 cup Coconut Oil: Adds moisture and helps create the smooth, creamy texture of the butter.
- 1/4 cup Sweet Almond Oil: A light oil that nourishes and softens the skin.
- 1 teaspoon Vitamin E Oil: Helps to protect the skin and provides additional nourishment.
- Essential Oils (optional): Choose your favorite essential oils for fragrance and their skin-loving benefits. Lavender, peppermint, or citrus oils work wonders!
- Colorants (optional): Natural mica powders or food-safe colorants to add a burst of fun color to your butter.
Step-by-Step Instructions
- Melt the Butters and Oils
Start by melting the shea butter, cocoa butter, and coconut oil together. You can do this by placing them in a heatproof bowl and gently heating them over a double boiler or in the microwave in 20-second intervals, stirring in between until melted.
- Add the Sweet Almond Oil and Vitamin E
Once the butters and oils are melted, remove them from heat and add the sweet almond oil and vitamin E oil. Stir until everything is fully combined.
- Cool the Mixture
Let the mixture cool for about 10-15 minutes. You can place it in the fridge for faster cooling, but keep an eye on it to make sure it doesn’t solidify completely. The goal is to let it cool to a point where it’s just starting to solidify but is still soft to the touch.
- Whip It Up!
Once the mixture has cooled to the right consistency, it’s time to whip! Use a hand mixer or stand mixer on medium-high speed to whip the mixture until it becomes fluffy and light. This usually takes about 5-10 minutes.
- Add Essential Oils and Color
If you’d like to add fragrance, now is the time to drop in your favorite essential oils. About 10-20 drops should do the trick. If you want to add color, divide the whipped butter into small bowls and add a little bit of natural mica powder or food-safe colorants. Stir each bowl gently until you achieve your desired color.
- Layer and Create Swirls
For a beautiful, multi-colored effect, layer the different colors of whipped butter in a jar or container. Use a spoon to create swirls for a fun, vibrant look.
- Store Your Whipped Massage Butter
Store your whipped massage butter in an airtight container. It will stay fresh for about 3-4 weeks, depending on the temperature of your environment. If the room is too hot, you might want to store it in the fridge to keep the butter from melting.
How to Use Your Whipped Massage Butter
To use your whipped massage butter, scoop out a small amount and gently massage it into your skin. The soft, creamy texture melts into the skin, leaving it hydrated and smooth. You can use it on dry patches, for a full-body massage, or as a nightly skin treatment.
Benefits of Whipped Massage Butter
- Deep Hydration: The combination of shea butter, cocoa butter, and coconut oil provides intense moisture that absorbs easily into the skin.
- Skin Softening: The natural oils soften and nourish the skin, leaving it feeling silky smooth.
- Relaxing Fragrance: Essential oils like lavender or peppermint help to create a soothing, aromatic experience during your massage.
- Customizable: You can tailor the scent, color, and texture of the butter to fit your preferences.
Have Fun with It!
This whipped massage butter is a fantastic way to pamper yourself or make a thoughtful gift for friends and family. The colorful swirls are not only visually appealing but also add a little extra fun to your skincare routine. So go ahead, get creative, and enjoy the process of making your own luxurious, skin-loving butter!
Whipping up a batch of this DIY whipped massage butter is not only fun and easy, but it’s also a treat for your skin! With nourishing butters and oils, a relaxing fragrance, and vibrant colors, this is the perfect addition to your self-care routine or a fun gift for someone special. Let the massaging begin!


